SmartSplice Tutorial 4: Lighting

Objective: Learn to use the light bloom filter.
The light bloom filter accentuates bright lights within images and can be used to add a soft glow to an image. The filter is perhaps most effective on images with patches of brights surrounding patches of darks.
This tutorial will assume familiarity with the extraction and insertion tools in SmartSplice. To gain such familiarity, first check out Tutorial 1.
Step 1: Run SmartSplice.
Tap on the SmartSplice icon to start the application.
Step 2: Load a working image.
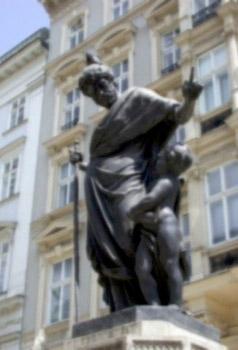
For best results, choose a picture with some mixture of brights and darks. The patches of brights will be accentuated and their light will bleed into nearby pixels after applying the light bloom filter. For our example, we will use the photo of the statue also used in Tutorial 1. This photo has a main subject that also possesses brights and darks.

Step 3: Extract the main subject.
Extraction of the statue is covered in detail in Tutorial 1.
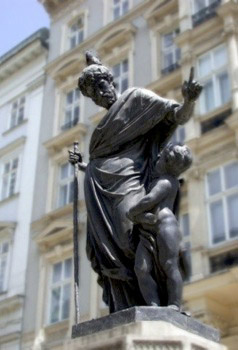
Step 4: Defocus the working image.
Now, defocus the working image. We want to defocus the background so that when the (in-focus) statue is re-inserted into the working image, it clearly becomes the focus of attention. Details on using the defocus filter can be found in Tutorial 2.
The defocus filter was applied twice for the image below.
Step 5: Insert the extracted clipping.
Insert the clipping back into the image (insertion is covered in Tutorial 1). You may want to zoom in the view to make it easier to align the position and size with the original object (here, the statue).
Step 6: Apply light bloom.
Now we apply the light bloom filter. From the main menu, press “Edit image” and then press “Filter image”. Then press the “Light bloom” button to apply the light bloom filter. The resulting image for the example is shown below.
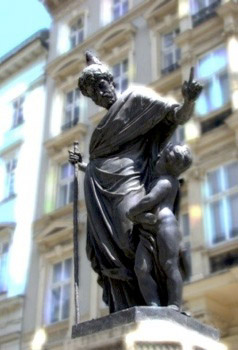
Note that brights in both the background and foreground have been accentuated. In this case, this is the effect we wanted to achieve. You can change the order of some of the above steps to alter the effect.
Save the image so that it is ready to be downloaded and shared.
Further notes about applying light bloom.
-
1)If you apply light bloom after applying the “Age photo” filter, the bloom can distort some of the color in the “aged photo.” Just apply the “Age photo” filter again to restore the same old photo look.
-
2)If the light bloom produces a desirable effect in one portion of the image, but a less desirable result in a different part of the image, just use the extraction and insertion tools to splice together the best parts from both images (just save the image before and after applying the light bloom filter).
-
3)When doing photo editing, it is always a good practice to save your results in between steps. This will allow you to quickly create many variants on the same image; you can decide which one(s) you like best at the end.