SmartSplice Tutorial 2: Focusing

Objective: Control focus to achieve “Tilt-Shift Faking”.
The ability to control focus within a scene is important in photography. For instance, in portrait photography, one may seek to present only the main subject in-focus to reduce the distracting details of the background. Point-and-shoot cameras, however, do not possess “depth of field” controls, so focusing effects must be achieved via image post-processing. Even expensive SLR cameras (with all their assortment of lenses) can only achieve certain focusing effects (like focusing only on a single plane). Luckily, SmartSplice makes it easy to achieve all sorts of focusing effects.
In this tutorial, we’ll discuss an effect termed “Tilt-Shift faking.” Tilt-shift photography refers to the use of a special lens that is able to change the angle of the camera’s focus plane. This change of angle can be used to capture very shallow depths of field to mimic the look of macro photography. When used on large scenes, this can give the feel of looking at a toy model. Tilt-shift faking refers to the process of generating such pictures without the use of the special tilt-shift lens.
This tutorial will assume familiarity with the extraction and insertion tools in SmartSplice. To gain such familiarity, first check out Tutorial 1.

Step 1: Run the program.
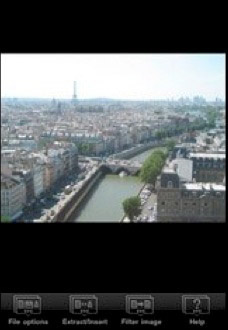
Tap on the SmartSplice icon to run SmartSplice. The opening screen will appear as shown on the right.
Step 2: Load a working image.
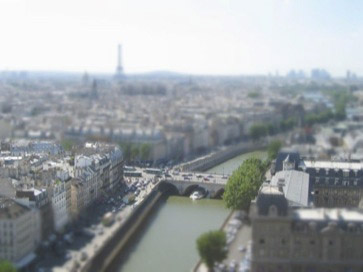
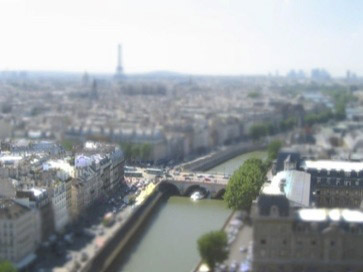
Load an image. For tilt-shift photography, you may get the best results if the scene was captured with the camera pointing at a slightly downward angle. If the objects in the scene are small, they will more easily pass as miniatures. For our example, we choose a bird’s-eye-view of Paris.
Step 3: Select the object/region that you want to remain in focus.
Decide which part of the scene should remain in focus. In tilt-shift photography, a default choice that produces decent results is just a horizontal strip across the image (the strip may not be strictly horizontal if you want to make sure buildings at a fixed depth are equally focused). For other applications, you may choose a particular person, animal, or structure. Extract the part of the image you want to remain in focus. We show the steps for our example below:
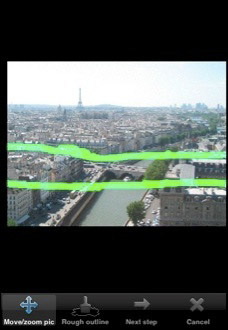
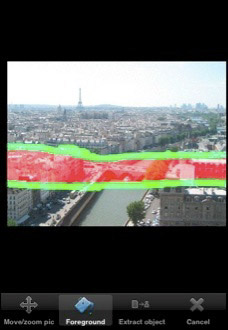
Coarse boundaries for the horizontal strip are specified above (shown above in green). We then fill in the foreground (shown below in red). We leave SmartSplice to choose the exact boundaries to use. In many applications, the extraction process may be more similar to that in Tutorial 1.
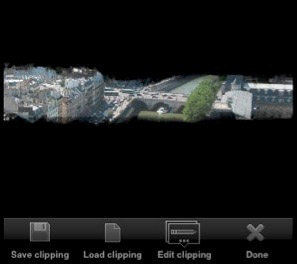
The result of the extraction is shown below. SmartSplice has chosen the actual boundary to follow the top of some buildings; this is convenient since it provides a slightly more natural boundary than a purely horizontal line. Save the clipping (this is of course optional, but it is always good practice to save intermediate steps).
Step 4: Blur the working image.
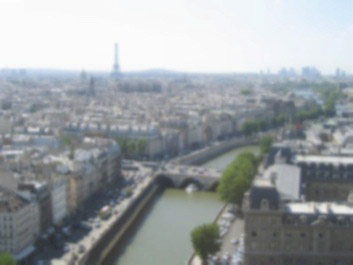
Press “Done” to exit the clipboard view. Press “Cancel” to exit the extraction and insertion menu. Now press “Filter image” to bring up the filtering menu. You can see there are a couple filtering options. In this tutorial, we’ll be mostly concerned with the “Defocus” filter. Press “Defocus” to defocus the working image. A progress bar will appear to show how much computation is left in applying the chosen filter. After the defocus completes, accept the filtering result; you can optionally keep pressing “Defocus” again until you get the desired amount of defocusing. The defocused image for our example is shown below.
Step 5: Insert the clipping.
Now insert the current clipping (which is in-focus) back into the image. You may want to zoom in the view of the image so that you can properly align the clipping to exactly overlay the spot in the working image it came from. The result is shown below.
Step 6: Save the image.
Press “File options” in the main menu and then “Save image” to save the working image to your Photo Album. You can now use this same technique to achieve various focusing effects in other images. You can also combine the steps above with the use of other filters to achieve other effects as well. A version with some light bloom in the front is shown below.
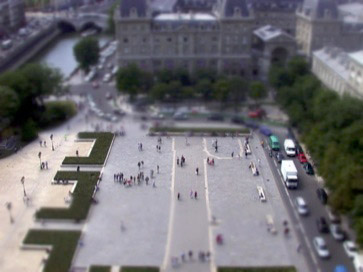
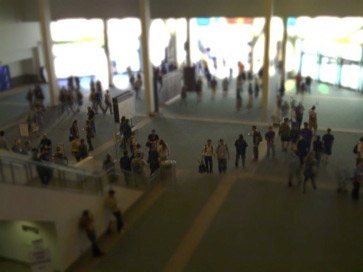
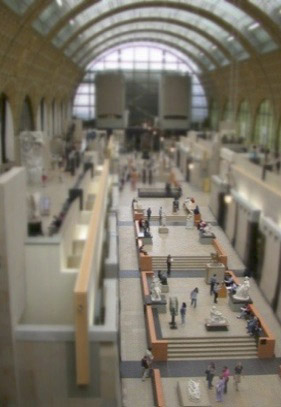
Some more examples created with SmartSplice: